Friday, November 5, 2010

Intro to Perspective

Aerial perspective: creates a sense of space through depicting the effects of atmospheric conditions

these conditions effect our perception of shape,color,texture,value, and size


Linear perspective: is the theory developed in the Renaissance based on the observation that parallel lines converge as they move into space.
*the point where they converge is the Vanishing Point
When drawing from life, the scene is translated from a set viewing position. The viewer's eye-level establishes the Horizon line: an imaginary horizontal line parallel to the viewers eyes.
The vanishing point or points are set on the horizon line.

1 point perspective


1 point perspective is usually used in situations in which the subject is parallel or perpendicular to the picture plane.


2 point perspective- uses 2 vanishing points. 2 vanishing points are used when the subject(s) are oblique (slanting/sloping lines and planes that are neither parallel nor perpendicular) to the picture plane.


To be continued...

Monday, October 11, 2010

Light and Shadow

Learning the rules that light and shadow obey, will help you understand what you are seeing and make it easier to draw!


Highlight: the area facing the light source and receiving the most light.

Halftone
: the transition between your highlight and shadow.

Core Shadow
: the darkest area of an object.

Reflected Light
: light from the source bounces off an object and creates a light area within the shadow, but it is never bright as the highlight.

Cast Shadow: the silhouette of an object projected opposite the light source.


*Don't forget: reflected light is never as bright as your lighted area.*

Saturday, October 9, 2010

Texture

So far in class we have worked with line, shape, and value.
This week we introduced another of the elements of art: Texture.

From 200 Projects by Valerie Colston


Remember there are three kinds of texture:
Actual, Simulated, and Invented.

Which kind of texture are we working with for our pinecone still life? For extra credit: Email me the answer and explain.


**Don't forget when dealing with a volumetric form you must be careful to not use your texture in such a way as to flatten out your object.**


Friday, September 24, 2010

Hatching and Crosshatching

Volume and Value.

One way of creating the illusion of volume in our drawings is to use modeling.
Modeling represents the change from light to dark across the surface of a shape (the highlights and shadows cast on an object).

Modeling (or shading) is all about the use of Value.

Values is a gradation of tone from light to dark.
White> Gray> Black

***Remember: Value is not color!***
Colors have value but value is the lightness or darkness of the color, thus you can have a red and a blue that are the same value, despite being different colors.
(One way to see this is to convert a color picture into grayscale/ black & white.)

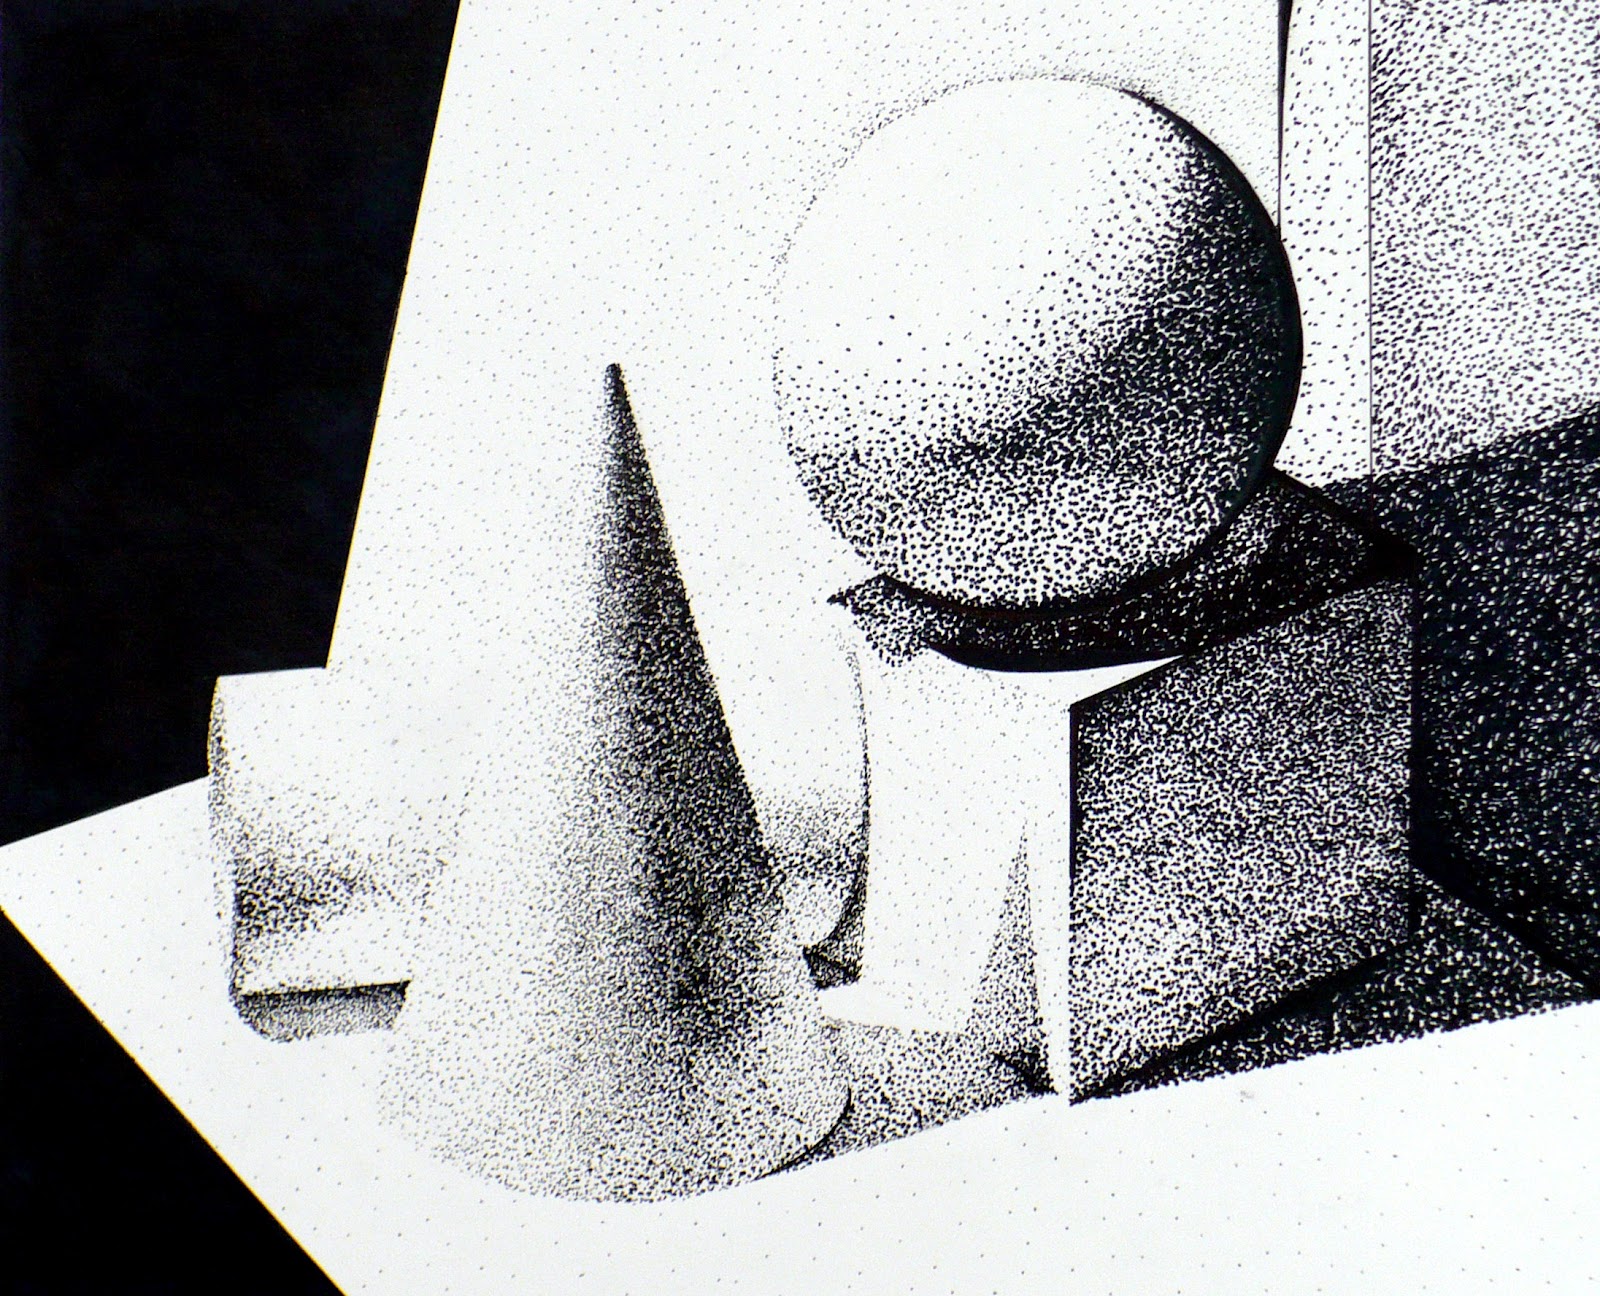
There are many ways to create value in art. One method we are using is mark-making: hatching, crosshatching, and stippling. Below are some extra examples:

(click to see the images larger)


from 200 Projects by Valerie Colston

Drawing on the Right Side of the Brain by Betty Edwards


And as you work on your own assignments don't forget there is no one absolute correct way to use hatching. (see below) There are different paths to the same destination, find the one that works best for you and your piece!


P1010875.JPG

Student example of stippling

Friday, September 17, 2010

Negative Space

Our first step was learning to perceive edges and represent them in LINE.

Now we are moving on to the next step which is learning to see and the use our lines to draw SHAPES. Geometric shapes, organic shapes, even implied shapes...

As an exercise in learning to perceive and draw shapes, this week we focused on NEGATIVE spaces.
This may be a tricky concept at first, but to make better drawings remember what Betty Edwards said:
“If negative spaces are given equal importance to positive forms, all parts of a drawing seem interesting and all work together to create a unified image.”
So what is negative space in a drawing?
Here are some extra examples:

(click on images for a bigger view)
Now if we were standing in front of this actual building it would be more difficult to see the edge of the negative space, but in our drawings, the picture plane makes up the edge of our negative space (as you can see clearly in the image on the left).

The next example is a more detailed
example of the negative spaces created
by a chair. I colored in a couple of
the corresponding shapes:
So, in the end, NEGATIVE space
is the area around the positive object.
And by learning to see the shapes
created by those empty spaces,
we can improve our observation
and drawing skills.
Because don't forget learning to draw
is a lot about learning to SEE.
(Sometimes in a whole new way!)

Sunday, September 12, 2010

More examples of contour and line

Here's another artist's selection of contour style drawings. Her subjects are not inanimate- as yours should be- but I think they are another excellent example of what can be done with LINE.


Find more artworks like this on artreview.com